How to Stop Concealer from Creasing
- Apr 14, 2025
- 4 min read
Updated: Jul 23, 2025
By Jasmine Torres, Makeup & Artistry | International Institute of Beauty
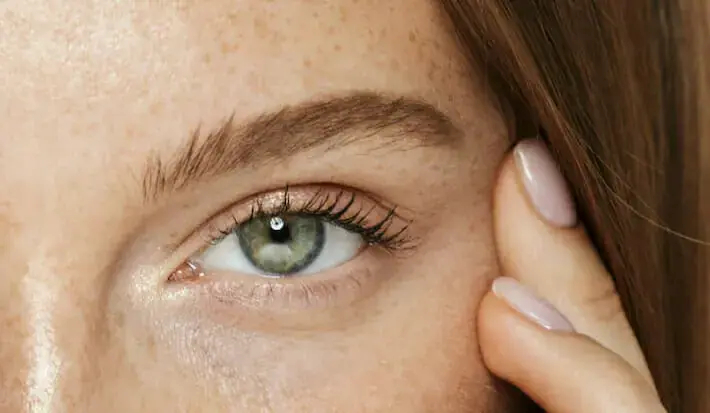
We’ve all been there. You leave the house looking fresh, your under eyes are bright and smooth, and your makeup is flawless. Then, fast forward a few hours, and your concealer has betrayed you gathering in fine lines, sinking into creases, and making you look far more tired than you actually feel.
Let me be clear: creasing doesn’t mean your makeup skills are lacking it’s one of the most common issues in makeup application, especially around the delicate under eye area. But with the right technique, prep, and products, creasing can be minimised or even eliminated entirely.
As someone who’s applied concealer on faces of all ages, skin types and tones from runway models to real life clients I’m here to give you the full breakdown on how to stop concealer from creasing. Let’s get into it.
First Things First: Why Does Concealer Crease?
Creasing happens when product settles into the natural fine lines or folds of the skin, especially in areas with a lot of movement like around the eyes and mouth.
The under eye area is particularly tricky because:
The skin is thin and delicate
It naturally has fine lines (even on younger skin!)
It’s prone to dryness and dehydration
Too much product or poor blending can easily make things worse
The good news? With the right prep, application, and setting, your concealer can stay smooth, bright, and crease free all day.
Step 1: Skincare Prep Hydrate, But Don’t Overdo It
The first mistake many people make is skipping under eye prep or using heavy creams right before makeup. You want hydration, yes, but lightweight hydration.
What to do:
Use an eye cream or serum that’s hydrating but fast absorbing. Look for ingredients like hyaluronic acid, glycerin, or peptides.
Wait at least five minutes before applying makeup, so the product can absorb properly.
Avoid anything too rich or greasy it’ll cause slipping later on.
Step 2: Choose the Right Concealer
All concealers are not created equal especially when it comes to creasing.
Look for:
Lightweight, flexible formulas that move with the skin
Medium buildable coverage (heavy concealers are more prone to creasing)
Hydrating but not oily or overly emollient
Longwear or self setting claims
My faves:
NARS Radiant Creamy Concealer
Maybelline Instant Anti Age Eraser
Too Faced Born This Way Concealer
Lancôme Teint Idole Ultra Wear All Over Concealer
Avoid super dry matte formulas under the eyes they tend to look cakey and emphasise texture.
Step 3: Less Is More Apply Sparingly
When it comes to concealer, the golden rule is use less than you think you need. You can always build coverage if needed.
How to apply:
Dab a small amount usually 2 to 3 dots on the inner and outer corners of the under eye.
Blend using a damp beauty sponge or soft concealer brush with a tapping motion.
Let the product sit for 30 seconds before blending if you want more coverage without layering.
Remember: Concealer is for brightening and correcting, not foundation. Don’t treat it like spackle.
Step 4: Blend It Right
Blending is where the magic happens. A poorly blended concealer is a creasing disaster waiting to happen.
Tools matter:
A damp beauty sponge will give you the most seamless, natural finish.
A synthetic concealer brush can offer more precision for targeted correction.
Fingers work too! The warmth can help the product melt into the skin, just make sure your hands are clean.
Tap don’t drag. The tapping motion presses the product into the skin without disturbing it.
Step 5: Set Strategically
Setting your concealer is crucial to lock it in place and prevent creasing. But not all powders are created equal, and how you set makes all the difference.
The best method:
Check for creases first. Gently tap out any product that may have settled before applying powder.
Use a finely milled loose powder. Look for translucent formulas designed for under eyes.
Use a small fluffy brush or powder puff. Lightly press (don’t swipe) the powder into the skin.
Top picks:
Laura Mercier Translucent Loose Setting Powder
Huda Beauty Easy Bake Powder
By Terry Hyaluronic Hydra Powder
For extra staying power, try the “powder sandwich” technique set with a tiny bit of powder, wait a few minutes, then lightly press another layer only where needed.
Step 6: Refresh Throughout the Day (If You Need To)
Even the best concealer setup can be tested by long days, heat, or humidity. The key is knowing how to freshen up without caking on more product.
Quick fix:
Gently blot any oil with blotting paper or a tissue.
Tap out any creases with a clean finger or sponge.
Lightly dust more powder only if absolutely needed never reapply concealer on top of set product.
Common Mistakes to Avoid
Let’s clear up a few misconceptions and mistakes that definitely lead to creasing:
Using too much concealer: More product = more movement.
Skipping eye prep: Dry under eyes = cracking and creasing.
Applying concealer to unprimed skin: Even under eyes need a smooth base.
Powdering too heavily or with the wrong formula: Not all powders are under eye friendly.
Not checking for creases before setting: You’ll just lock them in.
Final Thoughts
Creasing concealer can feel like one of makeup’s great betrayals but with the right prep, smart application, and careful setting, it doesn’t have to be your fate. The under eye area deserves finesse, not force. Hydrate, lighten up on the product, and blend with intention.
Remember: makeup is meant to enhance not hide what’s already beautiful about you. Your under eyes tell a story. They show emotion, laughter, and life. With the right technique, your concealer will support that story, not cover it up or crease it away.
So next time you reach for your concealer, channel your inner pro, tap with purpose, and walk out knowing your base is locked in and flawless no creases invited.


Comments